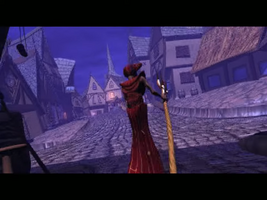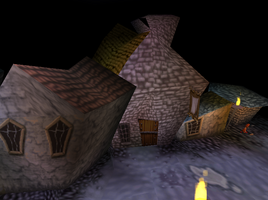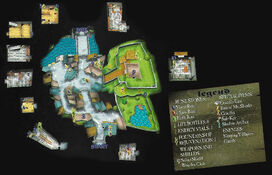
Map from the Official Strategy Guide.
| “ | This town was once so lively. What is the opposite of lively? Deadly? Yes, that is what this town is now. | ” |
The Sleeping Village (眠れぬ街 Nemurenu machi) is a level in MediEvil. It becomes available after completing the Scarecrow Fields level.
Intro[]
In the Sleeping Village, a Mr. Mad looks at his reflection in his axe, depressed for some reason. He groans, raises his weapon in the air, and violently slams it into the ground. Just then, Sir Dan shows up and meets the man.
Walkthrough[]
Walkthrough by Mirrorstar[]
Of major importance is the fact that your Chalice starts off at 59%. That is for the people of the town. They are innocent. If you kill them, it will detract from your Chalice percentage which can cause you to not be able to collect the Chalice. In other words, do not kill the people of the town even though they will try to kill you. The people of the town are the little girls with axes, the men with axes, and the women with pans (the same characters from the intro cutscene). At first, they are the only ones in this town. You can stun them by hitting them with the Daring Dash.
As you walk forward, an Information Gargoyle speaks to you. You should notice some rats in the street. Squash them with the Club or the Hammer for two coins each.
Walk down the street. On the left, you will see a doorway with a cross on the side of the entrance. Enter that church. Here, there is a Health Fountain. There is also the first book. Read it as it is important.
Those are your basic instructions for now. Leave the church. With the church to your left, walk up and then turn left and go up that street. You should hear a door open as you see a street on your right. Walk a little bit onto that street and enter that house.
In this house is a woman who will try to hurt you. Pick up the Moon Rune. Then, leave the house. From as you leave the house, continue to the right.
Keep going all the way to the end of the street where some steps lead down to a switch. Do not fall into the water or you will lose what is in your life meter. Hit the switch at the bottom of the steps. This turns off the water fountain in the middle of town.
Walk back up the steps. Start back the way you came with the steps behind you. Keep your eyes open to the left, where some stands are, for a Merchant Gargoyle. Continue and look to the right for an open doorway which you should enter.
You will see barrels. You can smash them with the Club or Hammer to get a moneybag. If you smash all the barrels, leave and return to restore them, though you can only get the money once. You should notice a square that sticks up out of the floor. Stand on it and a way will open, but the way closes if you move. So, walk up against a barrel to push it onto the square that is sticking up out of the floor. This will keep that square pressed into the floor. Walk into the blue hand to use the Moon Rune. Walk through the next part of the room and ignore the barrels while avoiding the woman. Walk down the stairs.
Once downstairs, smash the barrels to get a moneybag and another moneybag. Get the Club from the chest. Remember, you can squash those rats for coins. Exit the room on the right.
Avoid the man and run up the stairs. You are within the Troll's Head as you can see from the sign. Read the book near the sign. You can jump over the counter to reach the book more easily.
Equip your Club or your Hammer. You should see a wire cage in the corner. Break the barrels in front of it and enter it to get the Earth Rune. Be careful of the man in the cage. Go back downstairs.
Walk into the green hand to use the Earth Rune. Get the Energy Vial. Smash the barrels to get a moneybag and another moneybag. Hit the switch here to lower the bust. Then, go back upstairs.
You should see the bust near the book. Go up to the pedestal and jump towards it to get the Landlord's Bust. Go back downstairs. Exit on the left and go upstairs and then leave the building. As you exit, you finally find that monsters you can kill are coming into town. Make sure you search all around town for them. This is also nice because the little girls are no longer roaming the streets.
As you leave the house, turn so the steps are behind you and the doorway is to your right. Walk up the street until you see a street to the left. Go to the left and read the book by the Troll's Head sign.
Approach the fountain and pick up the Chaos Rune, which is down because you shut off the water. Look around and you should see a building with a red hand. Walk into the red hand to use the Chaos Rune, then enter the library.
Inside the library, be careful of the man as you read the history of this land. Start at the bottom end of the room and work your way up the wall as you read the many books. There's Volume 1, Volume 2, Volume 3 and Volume 4 of the History of Gallowmere. In the upper corner, you find the a book which tells you about the people in the Hall of Heroes. By the bookshelves, you find part 1 and part 2 of the Tourist Guide to Gallowmere.
Between the two tourist guide volumes, you can break the bookshelves with the Club or the Hammer or the Daring Dash. There you can get the Crucifix Cast and a moneybag. Also, read the last book in this building.
Leave the library. As you emerge on the street, go to the left and up a little to find a gate. Go to the right to find an Energy Vial. Go back to the library entrance so the fountain is in front of you and the library is behind you. Walk forward, past the fountain, and through the arch. Keep going to return to the church entrance.
With the church on your right, go to the left. You should see a building with a horseshoe sign on the front of it. Enter that building.
This brings you to the forge. Smash the barrels with your Club or Hammer to get a moneybag and another moneybag. Get the Silver Shield from the chest. Read the Blacksmith's Monthly.
Stand at the foot of the large, rectangular structure. Use the Crucifix Cast from your inventory. Then, use the Landlord's Bust. Stand on the bellows, which are to the left. Jump up and down on the bellows. Make sure you press all the way down before jumping again. Keep a good rhythm as you jump. This will heat up the forge. The bust will melt into the cast and create the Crucifix. Take it. Return to the church.
Stand behind the altar, near the book, and face the cross on the wall. Use the Crucifix from your inventory. A hidden area will open up for you. Take the Safe Key from there. As you take it, notice a gate opens. Read the book.
Leave the church. With the church entrance on your left, go to the right and all the way down the street to a lake. Be careful of the man. Go to the right, around the lake, to find a moneybag and an Energy Vial. Falling in the lake will drain your life meter. Go back to the entrance to the lake and go to the left. Enter the gate that opened earlier when you found the Safe Key. This brings you up to the higher level.
You should find some blocks piled on each other. Jump onto them so you can jump onto the lowest structure with a roof. Then, jump onto the next structure with a roof. Then, jump onto the roof of the house. Jump down the chimney to enter the house.
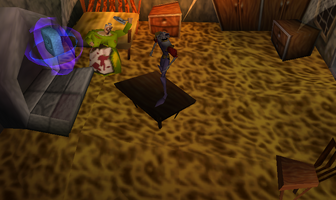
Jump onto the table to get a moneybag and another moneybag. Hit the switch to open the last gate. In the upper left, you should see a blue and gold safe. Stand in front of it and use the Safe Key from your inventory. Then you can take the Shadow Artefact. Leave the house by walking up and through the doorway.
With the entrance to the house above you, go to the right and through a hole in the wall. You will find an Energy Vial, a Chest of Gold, and the Chalice which you cannot collect yet.
Go back to the entrance to the house and follow the path through the gate. You will be back at the water fountain. Face the library and walk towards it, but walk to the left of it and beyond it. Go through the now open gate.
Afterward, four soldiers will arrive in the Village. I like to run in circles around them, or at least from side to side, and hit them with the Broad Sword. Once they are dead, the exit will open. Only now can you collect the Chalice. Read the fourteenth book there.
Do not exit this level. Go back to the house which has the safe inside of it. With the entrance to the house before you, go to the right and through a hole in the wall to get the Chalice. Return to the exit and leave.
Hall of Heroes[]
Run all the way to the end of the hall and up the stairs.
You must choose whichever one you did not choose the last time you were here.
Near the stairs on the left, you find the warrior queen, Imanzi Shongama. From her you can get the Spear. It comes with 30 throwing Spears. You can buy more from the Merchant Gargoyles. It cannot be powered up.
At the far end of the hall, upstairs, you find the centaur, Ravenhooves. From him you can get a Longbow with 100 Standard Arrows. You can buy more Standard Arrows from the Merchant Gargoyles. It cannot be powered up.
Locations and landmarks[]
- Main article: Locations in The Sleeping Village
Book of Gallowmere[]
Friendlies[]
Can you imagine how boring it would be to be a sentient being - wise even - and be stuck permanently to a brick wall? No wonder these guys are grumpy.
They pass time by eavesdropping, gossiping, and bad-mouthing any bizarre looking adventurers that might pass by.
Even in medieval times, there were vending machines designed to part a foolish hero from his gold.
Clever customers may qualify for a discount... just don't ask the merchant how he acquires his wares.
Enemies[]
Hypnotized citizens of a once thriving town.
They'll happily invite you in for tea, but if they ask to borrow a shovel, you should probably decline.
Zarok's mechanical goon squad, developed deep in the City of Madness (although they were manufactured in China, of course).
That coal in their stomach fuels them, whilst also cooking up a mean brisket.
These rats seem harmless, but they have tiny fingers and they're probably plotting something terrible.
Each rat you squish is an act of treason against the mighty rat king Derok.
Items[]
Weapons and shields[]
Runes[]
Artefacts[]
Treasure[]
Energy[]
Speech[]
- Main article: Speeches in MediEvil
Information Gargoyle (level start)[]
75 Information Gargoyle:
Poor villagers - the master possesses them. It mustn't hurt them. Hurt guards though, they seek out an object of great power.
| 75 | Information Gargoyle | Poor villagers - the master possesses them. It mustn't hurt them. Hurt guards though, they seek out an object of great power. |
Boiler Guard (after collecting Landlord's Bust)[]
16 Boiler Guard:
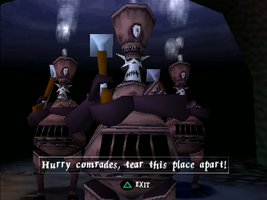
Hurry comrades, tear this place apart!
| 16 | Boiler Guard | Hurry comrades, tear this place apart! |
17 Boiler Guard:
If we don't find the Shadow Artefact Lord Zarok will have us mucking out the demons for the next millennium!
| 17 | Boiler Guard | If we don't find the Shadow Artefact Lord Zarok will have us mucking out the demons for the next millennium! |
Books[]
- Main article: MediEvil books
Book 1[]
A crucifix once stood here, but the mayor took it. Find a replacement and see how the church should really look.
Book 2[]
The rune key is held aloft by the flow of water from the fountain - you may have to wait for the next drought.
Book 3[]
To whom it may concern,
I must make haste for Zarok's men will be here within the hour. I have taken the crucifix from the church - it is the key to a key.
I used the cross to make the attached cast, then I had it destroyed. It is my hope that this cast falls into the hands of a just and good hero
Signed, the Town Mayor
Book 4[]
Bust of Mr Shanks, Landlord of the Troll's Head.
To clean the statue, lower pedestal.
Book 5 - HISTORY OF GALLOWMERE - Volume 1[]
During the dark time that was Gallowmere's not too distant past it was King Peregrin who thwarted Zarok the Necromancer and his plan to enslave the land.
Zarok, once the King's mage had fallen out of favour with the Ruler for conducting outlandish experiments on the bodies of the dead. It was said that deep within Peregrin Castle the dead were restless.
'The dead are to be honoured; not kept as the play things of alchemists!' declared King Peregrin as he banished Zarok from the Castle. All of Zarok's living dead were routed out and destroyed. Zarok being an unforgiving soul went into hiding and vowed to wreak his revenge on the King.
Book 6 - HISTORY OF GALLOWMERE - Volume 2[]
Rumors of ill doing and dark deeds abounded through the land of Gallowmere. It was whispered that Zarok had employed the aid of Shadowy Demons to help build a vast castle.
Under the cover of night, Zarok's dark army spilled forth from their corrupt haven. The army marched south across the Silver Mountains and through the Silver Woods. Soon afterwards, even the Pumpkin lands belonged to Zarok. The folk of Gallow's Town cried out for help, 'Save us good King Peregrin!'.
Retaliation was swift and violent. King Peregrin's forces led by the brave Sir Fortesque drove Zarok's army back from Gallows Town. There was much rejoicing, but the war was not yet over.
Book 7 - HISTORY OF GALLOWMERE - Volume 3[]
News that Zarok's army had now taken the flood lands caused much concern. From this vantage point Zarok could march west to take the Enchanted Forest. This sacred place would prove a bitter defeat if it fell into the hands of the evil sorcerer.
It was Sir Dan Fortesque who once again led the King's Militia to rid the demon host from the land. Yet the evil wizard was cunning and had prepared an ambush. A titanic battle ensued of which history has never since seen the like.
It is said that the day would have gone to Zarok but for the skill and valour of one man: Fortesque led the charge deep into the massed ranks of the undead, felling Zarok's bodyguard, the fearful Lord Kardok, and, before finally succumbing to his own mortal wounds, slew the traitorous sorcerer with a mighty sweep of his sword.
Book 8 - HISTORY OF GALLOWMERE - Volume 4[]
The forces of evil were destroyed but at a terrible price: none but a handful of the King's Militia returned from that field. Gallowmere lost a whole generation of young men that day, including Canny Tim, the legendary crossbowman and Fortesque's second in command, who fell in the first volley of arrows. Zarok's body was never found, though if it lies unmourned in an unmarked grave then no one in Gallowmere would shed a tear.
The Shadow Demons that had fallen under Zarok's banner were unnatural creatures that did not belong in the world of mortal men. The King declared that they be banished, entombed under the pure earth of the Enchanted Earth.
Imprisoned within an impregnable box of the King's design, the Demons were buried deep underground. Their Tomb was sealed with a magical device that has since come to be known as the Shadow Artefact.
Book 9 - TOURIST GUIDE TO GALLOWMERE - Part 1[]
The land of Gallowmere is a wondrous land of breath taking sights and adventure.
If it's beauty you are looking for, be sure to check out the sights of the Enchanted Forest.
Scale the heights and see the nests of giant Dragon Birds. Seek out weird and wonderful plant life. Go 'ooh' and 'aah' at the sight of baby Dragon Toads splashing about in the crystal clear ponds.
Why not take a walk through the Pumpkin valley!
Pumpkin is Gallowmere's favourite dish, and about now the valley is just bulging under the weight of young podlings awaiting harvest.
Book 10 - TOURIST GUIDE TO GALLOWMERE - Part 2[]
If it's mystery you're looking for then the seasoned adventurer should travel to the ruins of King Peregrin's castle.
Yes, this is the fortress from which the fabled King Peregrin once hailed! It is said that the King's Crown was lost in the dungeons below the Castle and that the ghost of the regent himself now haunts those cold stone passage ways. Spooky!
Why not take the swamps and seek out the mythical town of Mellowmede.
This place was once said to be a place of fantastical arcane alchemy, but an age has passed since it was consumed by the murky swamps. Perhaps great treasure awaits any adventurer that can locate its watery resting place?
Book 11 - HEROES FROM HISTORY: A Retrospective[]
Chapter 1
In addition to being the strongest man who ever lived Stanyer Iron Hewer was unsurpassed in his skill as a blacksmith. He was equally happy pounding on his anvil at home as he was pounding on someone's head in battle. It was said that his only fear was the end of the village smithy as the focus of manufacture in favour of more centralised units - as if!
Chapter 2
Born a humble peasant to one of the nomadic tribes from the Eastlands, Bloodmonath Skull Cleaver gathered an army of horsemen and swept over half the civilised world. When he finally died (attempting a single handed attack on a garrison in the North while armed only with the spike on his helmet) he was the richest and most powerful peasant of his day.
Chapter 3
Karl Sturnguard spent most of his formative years under siege at his family castle. With his impregnable magic shield Sturnguard's motto was 'the best form of attack is defence'. Sadly his shield couldn't protect him from poor eating habits and he died during a post battle feast while swallowing a large sausage he had failed to chew.
Chapter 4
Truly the hero's hero, Woden the Mighty, was fearless, single-minded, and uncompromising. Unbeaten in combat, he inspired raw fear in friends and enemies alike, not to mention in close family members and pets.
Chapter 5
Trained from birth in all forms of combat, Imanzi Shongama was the warrior queen of a tribe of Amazons. The bold and the beautiful Shongama banished all males from her territory except the handful she kept on to mow the lawns of her people.
Chapter 6
A full time mother and homemaker, Megwynne Stormbinder had to defend her settlement from barbarian raiders while the menfolk were away on a hunting trip. She fought off repeated attacks armed only with a pitchfork and a rolling pin and with one arm holding her baby. Legend has it that the Gods, impressed by her indomitable courage, intervened and added thunder bolts to her arsenal. She won the battle with a couple of bolts to spare on her husband when he finally returned.
Chapter 7
Dirk Steadfast was a fearsome opponent thanks to his magic sword and a firmly held belief that 'only women defend themselves - real men are always on the attack'. He was a friend and contemporary of Karl Surnguard and was with him even to the end: it was whilst Steadfast explaining his views on Sturnguard's shield during a feast that the latter had his tragic and inexplicable accident.
Chapter 8
Descended from the finest centaur bloodstock RavenHooves the Archer was the last prince of his people. A proud and haughty aristocrat he was an accomplished hunter, sportsman, duellist, playboy, raconteur, and three times Derby winner.
Chapter 9
Captain of the Militia in the time of King Peregrin, Sir Daniel Fortesque found fame when he killed the renegade wizard Zarok. A career soldier raised in the royal household he was adored by the men under his command and renowned for his loyalty to Gallowmere. It was said that Fortesque was always destined for greatness, with his square jaw, steely gaze and thick shock of hair, as black as ravens' wings, he looked every inch the hero.
Book 12[]
Dear Sir or Madam
On my travels across Gallowmere I have come across many mysterious and enchanting finds. However, that which filled me with deepest dread was discovery of the Tomb of the Shadow Demons! The key to their dank prison, the mysterious Shadow Artefact, is now in my possession.
That dress-wearing bully boy, Zarok, will stop at nothing to retrieve this item. I fear that already he knows that it is I who possess it...
Yours, fearfully - the Town Mayor
Book 13 - BLACKSMITH'S MONTHLY[]
Old man Willy Green of Gallows Town was awarded Smithy of the season by our readers. His outstanding casts have produced many intricate and hard wearing iron goods and sculptures. Willy only uses the finest of metals in his work, and is particularly noted for his magnificent Busts!
Old man Willy was quoted as saying, 'Aye when I get pumpin' on me bellows there's no stopping me, it's all in the rhythm, up n' down, up n' down! I've always been inspired by the stories of Stanyer Iron Hewer the greatest Smithy that ever there was!'
Book 14 - Instructions from Zarok to his guards;[]
Capture that greedy profiteer the Town Mayor.
Take him to the Asylum Dungeons.
Give the fat boy a good going over!
Locate the Shadow Artefact.
Bring me back something nice!
Related trophy[]
Don't harm the Mad family. |
Gallery[]
Artwork
Screenshots
Trivia[]
- Jason Wilson listed imagery from German Expressionism films such as Der Golem and The Cabinet of Dr Caligari as inspiration for this level.[1]
- At an earlier stage of development, the village was called Burtonville, likely as a nod to Tim Burton, whose works greatly inspired MediEvil's art style.[2]
References[]
- ↑
 Jason Wilson, Reference and inspiration for the game MediEvil on Facebook. Published November 3, 2014.
- ↑ Especial MediEvil - El nacimiento de una leyenda (o casi) in Hobby Consolas No. 70 (archived version at Archive.org). Published July 1997 by Axel Springer España.
| |||||||||||||||||||||||||||||||||||||||||||||||||||||||||||||||||||||||||||||||||||||||||||||||||||||||||||||||||||||||||||||||||||||||||||||||||||||||||||||||||||||||||||||||||||||||||||||||||||||||||


