| “ | The Battle of Gallowmere is long past, but an army of the undead still marches through these muddy plains. Try not to trip on your own grave! | ” |
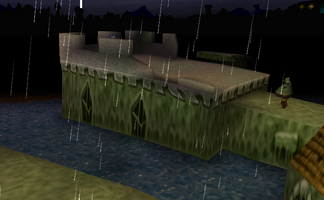
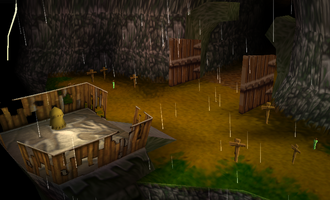
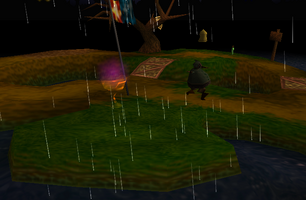
Pools of the Ancient Dead (死者たちの沼 Shisha-tachi no numa) is the fourteenth level in MediEvil. It is where the Battle of Gallowmere was fought against Zarok, 100 years prior to the events of MediEvil; presumably, it was here where Sir Dan was killed. It has since become inundated with large quantities of water, converting it into a swamp, filled with undead soldiers. Dan talks to the Boat Man here, who says he will take Dan to the sunken town of Mellowmede if Dan brings him eight lost souls.
Walkthrough[]
Walkthrough by Mirrorstar[]
The biggest danger of this area is falling into the water which drains what is in your life meter. Be careful as you walk and jump.
You start off on a decent sized patch of ground. Walk down to find a BAG OF COINS. Then go up and talk to the GARGOYLE.
Walk across the wooden bridge and find the FIRST BOOK, which is the only book.
Walk around to the right, or left, so you can jump up the steps. There you will find an ENERGY VIAL. Follow the stone path onward. To the right of the path, you should see something is in the water. As you approach it, it will become a tentacle that will attack you. You can fight back if you wish, but such tentacles do not count towards your Chalice percentage.
When you have a choice, go to the left. The path stops, but there is a stone platform not far from you. Run towards it and jump to do a running jump and land on that platform. (When doing running jumps, try to time it so you jump at the very last moment so that you can get the most distance.) The Boat Man will speak to you. You are given your task to gather eight lost souls.
Do a running jump back to the path. You will notice a zombie in a large suit of armor. You need to use your weapon to force such zombies into the swamp where they will sink. They do count towards your Chalice percentage.
Walk to the corner where you have to go left. You will pass another tentacle. Jump up onto the round corner. Continue to a rectangular area with a MERCHANT GARGOYLE at the end of it. To the right is a path. Do a running jump to reach it. Walk along it to the ground. Be careful of the tentacle to the right of that path. Walk forward toward the FOUNTAIN, and be careful of the tentacle in the pool to the right.
Once at the Fountain, walk to the right. You will notice gold bridges connect a lot of the land. Take note that each time you find a lost soul, some of those bridges will disappear. Once you have all the lost souls, no such bridges will be left.
You should see a chest with a skull and crossbones. Feel free to break it open and release KUL KATURA. Remember, you cannot control this serpent and it will only exist here for a limited amount of time.
Cross over using the gold bridge to the right. Look around for another chest with a skull and crossbones and walk towards it. Be very careful if you hit it as it has a time bomb. Even if you are at a relatively safe distance from the bomb when it explodes, it can still push you.
With that chest in front of you, go to the left. You should see a bag on an island. Do a walking jump to reach the BAG OF COINS. Then, you may want to try to do a running jump to return to where you were. (A running jump to that island may go too far, but a running jump from the island makes it more likely you will successfully make it across.) You should see a yellow object. Make a running jump to reach your first SOUL HELMET. Return to the chest with the time bomb.
This time, with that chest in front of you, go towards the right and pick up the CHAOS RUNE. Then, look around yourself until you see the Chalice in the distance. Walk towards the Chalice.
Very near the Chalice, walk over a gold bridge. This brings you to a tree with two shields on it. Take the second SOUL HELMET. Also, take the ENERGY VIAL. Since both bridges are gone, just to be safe, with the tree in front of you and the Chalice behind you, go to the left.
Walk towards and then past the Chalice. Ignore any ways to the right and keep going until you find the third SOUL HELMET. Then, the bridges vanish. While at the flag, where you found the Soul Helmet, you should see a path to the right. This path has a pointed end. With the flag to your left, do a running jump to jump onto the path. Follow it back to the stone path which leads back to the Merchant Gargoyle.
With that stone path to the left, walk forward and take the first right. You should see a chest with a skull and crossbones. In it is a time bomb. Set it off at your own risk. You should also see the fourth SOUL HELMET, so take it. (If you walk to the Soul Helmet without going over the gold bridge, be careful while walking in-between the poles.)
With where you just took the Soul Helmet behind you, walk forward and walk to the right across the first gold bridge you find. This leads you onto an oval area with an ENERGY VIAL. The way is narrow, so proceed with caution. Then, cross back over that bridge.
You should see an area with a lot of chests that all have a skull and crossbones on them. You want to take care of them while the gold bridge for this is still present. Center on the chest which is near the tree. You should just have to run in a straight line across the gold bridge to reach it. Trigger it. Then run back across the bridge. That should set up a chain reaction which will explode most or even all of those chests for you. Then you will not have to worry about them.
With that gold bridge you just ran across in front of you, go left and up. You should find a SILVER SHIELD in a chest. Not far away is your fifth SOUL HELMET.
From where you found the Soul Helmet, you should see an isolated piece of ground. Do a walking jump to it. From there, do a walking jump to the area with a large tree with two shields on it. (This is the area with all the chests from earlier.) You should see the sixth SOUL HELMET in front of you, so take it.
Keep going to find a gate. Walk into the red hand to use the Chaos Rune. As you walk forward, the view will shift so the two chariots are at the bottom of the screen. In this view, you need to look towards the left. You should see treasure on the island in that direction. Keep close to the wall and do a running jump to that island. There you will find a CHEST OF COINS, another CHEST OF COINS, an ENERGY VIAL, another ENERGY VIAL, and a LIFE BOTTLE. Be careful of the tentacle. Again, staying close to the wall, do a running jump back to the area with the chariots.
Next to the chariots is the seventh SOUL HELMET. Taking it will trigger some enemies to appear. Walk past the chariots and down the path. Be careful of the chariots as they will roll down after you. At the bottom of the path, you will find an ENERGY VIAL, another ENERGY VIAL, and the eighth and final SOUL HELMET. When you take it, enemies will appear and the exit will close. I would advise you deal with the thin zombies with the throwing weapons first and then deal with pushing the fat zombies over the edge. Kill them all to open the exit.
Run back up the path. Last, you need to fill up your Chalice. Consider using some sort of distance weapon as flying monsters have appeared. Walk out of the gates that needed the Chaos Rune. Keep to the right as you walk. Do a walking jump back to that isolated piece of ground. Do another walking jump to go back to where you see a broken chest on the ground, where you got the Silver Shield earlier.
Go to the left and then stay next to the right edge to return to the stone path that leads back to the Merchant Gargoyle. Keep walking past the stone path, while staying along the right edge, until you are at the path with a point at the end of it. There are two other areas near it. Make a running jump to the one with the square end which has no grass on it. Once there, walk to the far end of this path and make a running jump towards an area with a chest, which has or had a time bomb. With the chest in front of you, go to the right. Then look around and you should be able to walk into the CHALICE.
Walk back to the last chest mentioned. With it behind you, do a running jump onto the next piece of ground. Walk forward and do a running jump onto the pointed piece of ground. Then go to the right and keep close to the left edge until you are back at the stone path. Walk up it. Do a running jump off of the end of it to return to the Merchant Gargoyle.
Walk away from the Merchant Gargoyle. Jump up onto the round corner. Follow the path to the right. As you turn on the next corner, ignore the way you see to the side and walk to the end of the path. Do a running jump back to the platform.
Once at the Boat Man, use the Soul Helmet from your inventory and he will give you a ride.
Book of Gallowmere[]
Friendlies[]
Can you imagine how boring it would be to be a sentient being - wise even - and be stuck permanently to a brick wall? No wonder these guys are grumpy.
They pass time by eavesdropping, gossiping, and bad-mouthing any bizarre looking adventurers that might pass by.
Even in medieval times, there were vending machines designed to part a foolish hero from his gold.
Clever customers may qualify for a discount... just don't ask the merchant how he acquires his wares.
This formidable serpent was somehow lured into a tiny chest and trapped by men working for King Peregrin - probably, it must have been a magic chest because really, this is one huge serpent to fit in such a small box... but anyhow, the King believed he had imprisoned the evil Serpent of Gallowmere, when in fact it was kindly Serpent Lord Kul Katura that he had en-boxed.
Katura is probably going to have a big hug for whoever sets him free, and an ever tighter one for his enemies.
Enemies[]
The heaviest of infantry and most ill-suited for the Battle of Gallowmere. Many of them fell victim to the deep mud, rather than swords or spears.
These undead knights are most effective when rolled down hills or launched from catapults.
The soil of the Ancient battlegrounds, made fertile by the blood of centuries, spits forth the husks of these sorry souls.
Their battle should have long since ended, and yet they still march in proud defiance of the living.
These crestfallen cravens once fled the battlefield and are now bound to it, doomed to forever relive their greatest moment of shame (and forever is a long time).
Tough break. I guess being dead isn't all fun and games.
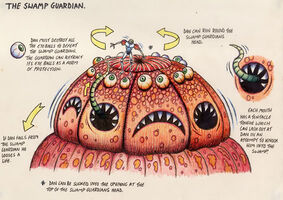
Touchy feelers of the Swamp Guardian, said to live deep below the water's surface.
Though too timid to show his many faces, he still likes to stay in touch. Sometimes, he stays in touch too hard.
Books[]
- Main article: MediEvil books
Book 1[]
Weapons are useless against the heavy armour of the knights. Don't let them shove you in the swamp - that mud will never come out.
Gallery[]
Artwork
Screenshots
Trivia[]
- A boss battle against the Swamp Guardian was considered for this level, but the idea never made it past the conceptual stage.
| |||||||||||||||||||||||||||||||||||||||||||||||||||||||||||||||||||||||||||||||||||||||||||||||||||||||||||||||||||||||||||||||||||||||||||||||||||||||||||||||||||||||||||||||||||||||||||||||||||||||||


