| “ | Shadow Demons were locked away in this shady forest by a great hero long ago. Not the worst place to be sealed away for eternity. Whatever you do, don't lick the toads! | ” |
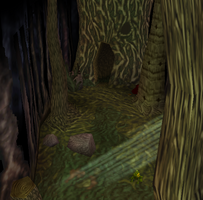
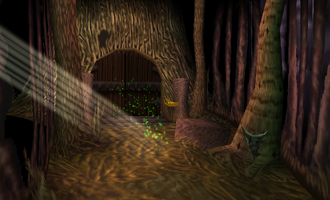
The Enchanted Earth (封印の地 Fūin no ji) is a level in MediEvil. The Shadow Demon tomb is located here. Although the level becomes accessible after completing the Return to the Graveyard, it cannot be completed without the Shadow Artifact, which can be found in the Sleeping Village level. The Forest Witch resides here and has a quest for Sir Dan to complete.
Walkthrough[]
Walkthrough by Mirrorstar[]
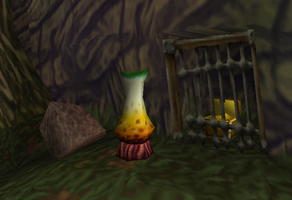
Make sure you use your shield to deflect the poison from the frogs. Frogs can be killed, but do not count towards your Chalice percentage. You can see a Merchant Gargoyle behind a gate, but you cannot reach it yet.
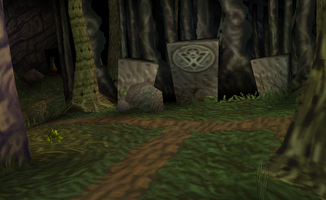
Run all the way down to a symbol on a rock slab. You could go to the right, but it is blocked by a gate, so go to the left.
Use your shield for the projectiles of the plants as well. Plants can be killed, but do not count towards your Chalice percentage. Ignore the Cauldron area and the book there. With the Cauldron before you, go to the right. You will pass a chest behind a gate that you cannot reach yet. Keep going until you are in a shallow pool of water.
Going left is very painful because of the red energy, so do not. You cannot avoid the red energy yet. Go to the right. Read the FIRST BOOK.
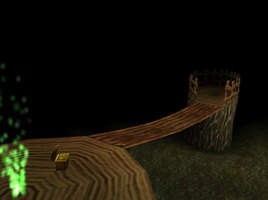
Keep going that way and you will find a Fountain. At that Fountain, run around that tree to find a Chest of Coins and another Chest of Coins which are hidden from view. Then, go back to the steps in the huge tree stump and jump up them. Walk onto the elevator. When it comes to a stop, walk onto the next elevator. Falling down is a bad idea while on the second elevator as you will lose what is in your life meter. Once at the top of the track, jump up the ledges that go up the huge tree to reach the top.
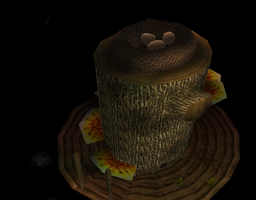
Once in the nest, be careful as the bird will attack. When it does, use your shield so that you duck down and out of reach. You need to push the eggs out of the nest. You do this by walking into them in a direction in which they will roll. This will break them so that you can take what is inside of them. In this way you will get a Chest of Coins, a Copper Shield, and the Earth Rune. Then, jump back down using the ledges.
Use the two elevators to return to the ground. Return to the pool of water. With the red energy trap to your right, go forward. You should see the Cauldron is ahead of you. Before you are close to the Cauldron, you will need to go to the left to go towards a gate. Read the SECOND BOOK there.
Walk into the green hand to use the Earth Rune. Walk past the gate. I would suggest using a distance weapon to kill the frog before jumping from point to point across the water. Walking jumps will work fine. The Gargoyle will speak to you. It seems you need a Shadow Artifact. Pick up the Bag of Coins.
If you do not have the Shadow Artifact, exit the area to the right. This is the quick exit in case you came here too early. If you do have the Shadow Artifact, you cannot exit to the right.
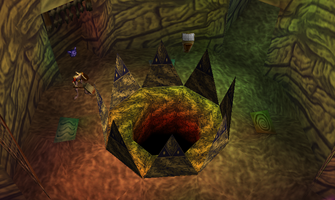
Approach the face with a door for a mouth. Use the Shadow Artifact, from your inventory, to open that door. Drop inside. You soon find the THIRD BOOK.
Near the third book, you see a symbol on the floor that represents earth. It almost looks like an abstract tree. If you go to the left, you find a symbol for water made up of three waves. If you continue left, you find a symbol for fire which looks like a simplistic drawing of a camp fire. The last symbol, the spiral, must be air as that is the only element left. Above the symbol for fire, you can see an image on the wall which tells you what is trapped in the center of this room.
You need to stand on the four symbols, in the correct order, to open up the center jail. The combinations possible are limited, so trial and error works well enough. If you press them in the wrong order, they will reset.
The combination is: fire, air, water, and earth. That releases the Shadow Demons. (Aren't you proud of yourself?) It also opens up the gates. Two of those gates are in this room. In between water and earth, you can now take the Shadow Talisman. In between air and fire, you find the Chalice, but you cannot possibly take it yet. Exit from in between fire and water. You will find an Energy Vial. There is a symbol of an eye on the floor. Stand on it to leave.
The Gargoyle will speak with you. He is not happy with you. The Shadow Demons will be lurking around this forest now as well. They do, at least, finally give you something with which to fill up your Chalice. You will notice the exit to the level is here, but you need the right rune first.
Kill the three Shadow Demons, in your general area, and the gates will open up for you. Run out until you come across the symbol on the slab of rock. This is just before three plants that block the path. Then, go to the left. Watch to the right for the Merchant Gargoyle, which you can now reach since the gate was raised. Return to the symbol on the slab of rock. With it in front of you, go to the left.
With the Cauldron in front of you, go right. Watch to your left for the Chest of Coins which you can now take since the gate was raised. You should be back at the shallow pool of water.
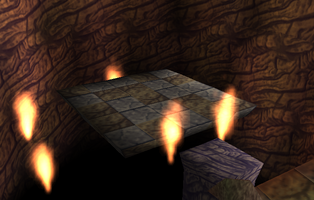
While in the water, face the red energy trap. To the left, you should see a place in the rock that looks just like the shape of the Shadow Talisman. So, face it and use the Shadow Talisman from your inventory. This turns off the red energy trap. Walk up the steps. Do a walking jump to the block over the void. Then jump to the patch of floor. Take the Star Rune.
Taking the Star Rune will start a battle. You will be attacked by two, strong Shadow Demons.
I would suggest starting the battle with the Spear and then switching to the Flaming Longbow. Make sure you keep an eye on your targeting sensor so you do not throw away your weapons without hitting your targets. Remember you have to face your target to get a target lock. Also remember that it is hard to maintain a target lock on fast moving targets.
Try to stay in the center of the floor because periodically the floor will tilt. If it does tilt, try to run to stay on the floor. If you fall off, you will lose what is in your life meter.
As they are flying around you, remember you can use your shield (Gold, Silver, or Copper) to block their blasts. However, staying on the floor is more important than blocking.
As you progress in the battle, one of the Shadow Demons will hover near you and cause boulders to fall down around you. This is a good sign as the floor won't be tilting anymore at that point. If you can get a target lock on it at this time, you can do a lot of damage.
Once you defeat them, jump off on the right. Follow the stone path around to the left to find a Fountain. Then, walk the wooden path to the right to find another Fountain, a Chest of Coins, another Chest of Coins and yet another Chest of Coins. Continue onto the next wooden path to find an Energy Vial and another Energy Vial. Then, drop down the center of this tree trunk. At the bottom, you will find a Bag of Coins. (As you walk the wooden paths, be careful you do not fall or you will lose what is in your life meter.)
Turn around so that where you just fell is behind you and run past the shallow pool of water. The Cauldron should be ahead of you, but still in the distance. Then, go to the left and through the gate where you needed the Earth Rune. You may want to use a distance weapon on the plants first before you jump across. Once across, drop back down into the doorway.
From in between the air symbol and the fire symbol, take the Chalice. (If for some reason your Chalice is not full yet, proceed to the exit of this entire level where you will find more Shadow Demons to fight. Then, return to the Chalice.) Leave from in between fire and water. Stand on the eye to exit.
Walk into the yellow hand to use the Star Rune. Then, leave this level.
Book of Gallowmere[]
Friendlies[]
Once part of the infamous Cemetery Hill coven, Emelda was ostracized by her sisters when she refused to stop using the communal cauldron to prepare her notoriously pungent lunchtime brews.
She now resides in the Enchanted Earth, where no one complains. Or at least if they do, she just turns them into a toad... and seriously, do NOT lick those toads.
Can you imagine how boring it would be to be a sentient being - wise even - and be stuck permanently to a brick wall? No wonder these guys are grumpy.
They pass time by eavesdropping, gossiping, and bad-mouthing any bizarre looking adventurers that might pass by.
Even in medieval times, there were vending machines designed to part a foolish hero from his gold.
Clever customers may qualify for a discount... just don't ask the merchant how he acquires his wares.
Enemies[]
Is this really what the ancient dragons evolved into? Their dreadful ancestors would be ashamed!
Don't lick their backs. That's a good way to end up in the loony bin. No really, just DON'T.
Poisonous pollen protects these plants from predators.
Just to be safe, they fire it at everything. Can never be too careful these days.
Some of the most evil, murderous critters ever to blight the land! Thankfully, they were locked away in a hermetically sealed vault by a great hero hundreds of years ago. Don't worry! We're safe! Only a complete fool would ever set them free.
Oh... please tell me you didn't?!
Bosses[]
Everything is a competition for these demon sisters. When not disemboweling intruders, they enjoy a good game of chess.
We'll never know who is better. One of them always flips the table.
She's not just a set of legs - there's a whole devoted Mother Bird up there! And no one treasures her eggs more than this bird mama.
They may someday hatch into beautiful baby birds. Or maybe just into beautiful bags of gold... or bags of golden babies? Who knows?
Books[]
- Main article: MediEvil books
Book 1[]
There used to be a Coven of Witches in the caves beneath Cemetery Hill, the whole forest's never smelt the same since.
Book 2[]
Like a giant Magpie the Dragon Bird sits upon its hoard of stolen treasures. High above the trees you will find a nest; those Eggs are worth their weight in gold!
Book 3[]
Keep out! This gate leads to the tomb of the Shadow Demons.
Book 4[]
Sir Dan, you must take the Shadow Demon Talisman!
It is an unholy relic but it may allow you to progress through the Shadow Demon territory.
Related trophies[]
Destroy both Demonettes in the Enchanted Earth. | |
Collect the Witch Talisman and complete both witch quests. |
Gallery[]
Trivia[]
- This is one of the three levels across all MediEvil games to have multiple exits, the others being the Gallows Gauntlet and Gallowmere Plains.
| |||||||||||||||||||||||||||||||||||||||||||||||||||||||||||||||||||||||||||||||||||||||||||||||||||||||||||||||||||||||||||||||||||||||||||||||||||||||||||||||||||||||||||||||||||||||||||||||||||||||||


